MyChat enterprise messenger installation in Active Directory
In this article Windows Server 2008 R2 is used. In other server OS versions, all described actions can be performed in a similar way (there can be only small differences in the operating system interface).
Download MSI package for MyChat
The entire Group Policy (GPO) configuration is being done in the "Server Manager" section.
First of all, open the domain or subdomain in which MyChat is going to be installed. To do this, expand the following sections: "Components" — "Group Policy Management" — "Forest: (your forest name)" — "Domains" — "the domain name (where the installation will be performed)":
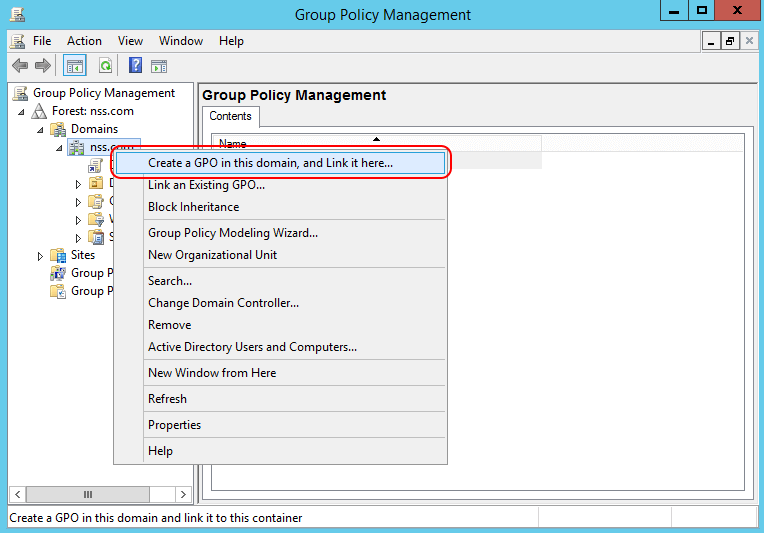
Open the context menu on your domain name and select "Create a GPO in this domain...", give GPO name ("MyChat", for example).
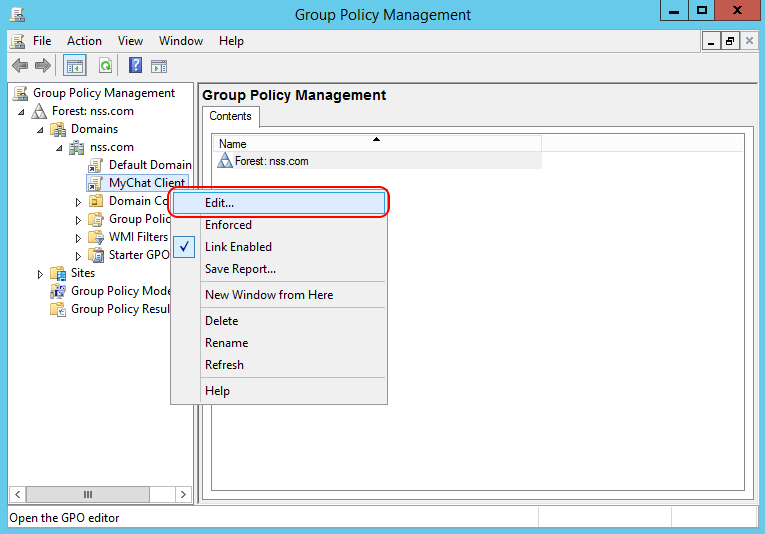
Now you need to set up the newly created GP, select "Edit" in the context menu:
2. Setting up Group Policy for automatic package deployment
In the opened "Group Policy Management Editor" we are going to configure the "User Configuration".
A little distraction from the Group policy configuration. Do not close the editor.
Attention! Before you continue the GPO setup, place the mccient.msi package on a shared network resource, where you can get from any computer with installed MyChat. For example, create "MyChat_msi" folder in the domain controller and share access to it over the network. Copy the mcclient.msi setup file in the "MyChat_msi" folder.
Let's back to the GPO setup. For an MSI deployment, you have to create a setup package. Open "User configuration" — "Policies" — "Software settings" — "Software installation". In the right part of the context menu select "New" — "Package...":

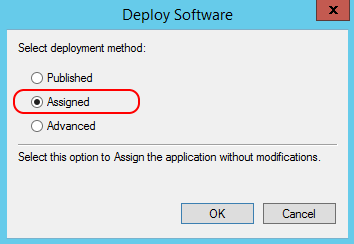
It's very important to specify the Network path to the mcclient.msi package in the package selection window. After you choose the package the system offers you a package deployment option, select "Assigned":
Now MyChat Client appears in the packages list. Open "MyChat Client Properties" in the package context menu and go to the "Deployment" section:
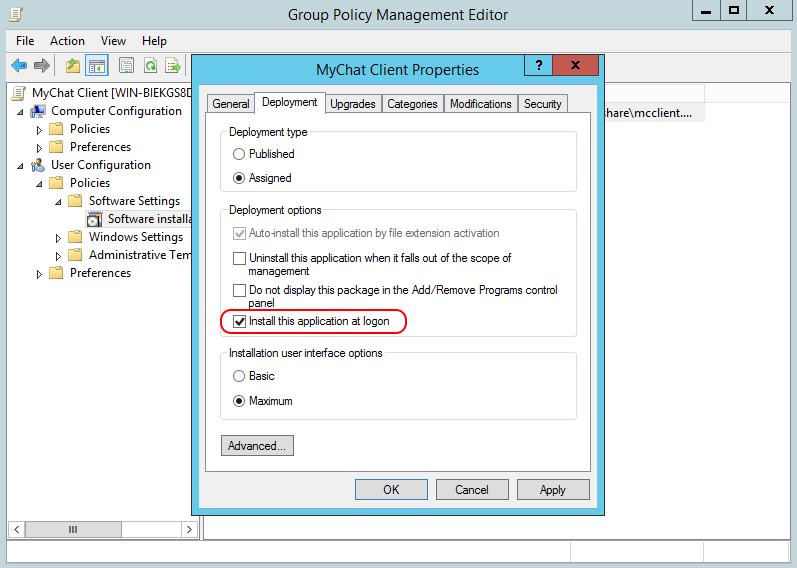
Enable checkbox next to "Install this application at logon" to install the package automatically after user registration in the system.
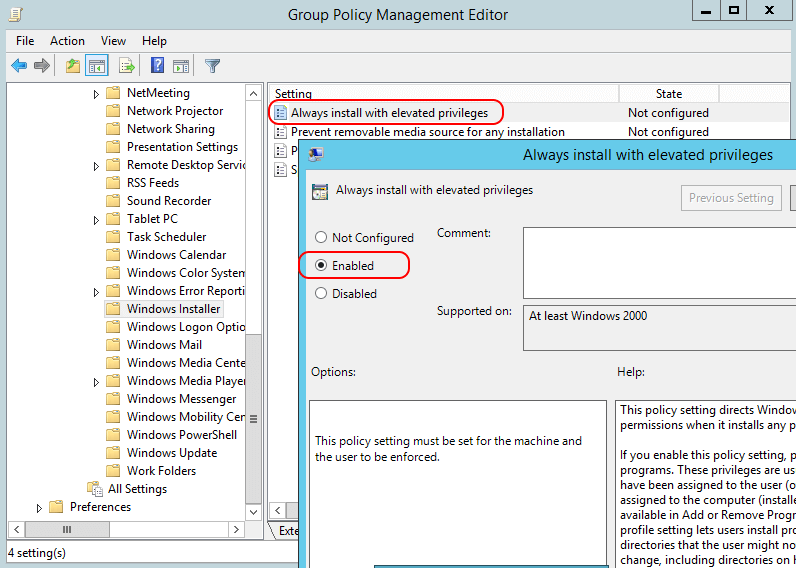
Of course, domain users have limited rights to install software (the chat can be installed both in the "Program Files" folder and to a user profile — depends on the type of the MSI package), so it must have elevated privileges during the installation process. Enter "User Configuration" — "Policies" — "Admin templates" — "Windows Components" — " Windows installer" and enable "Always install with elevated privileges" (same rule must be set in "Computer Configuration"):
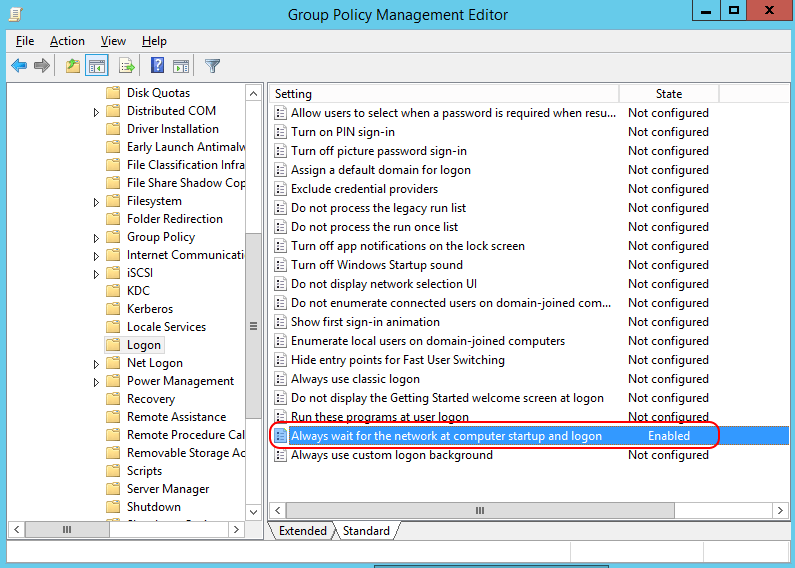
Attention! If you encounter error №108 "The Software Installation client-side extension is responsible for installing software, applied through Group Policy, to both computers and users", you need to set an additional rule to avoid it. Set up a synchronous mode of the Policy enforcement: "Computer Configuration" — "Policies" —"Admin templates" — "System" — "Logon", enable "Always wait for the network at computer startup and logon".
3. User transparent authorization in the domain. Setting up the script for MyChat Client automatic launch
MyChat Client must know where to connect, so he needs to inform you about it somehow. The client searches for the domain information (name and IP address) in the local registry.
To add an entry to the client registry automatically, we suggest you to create "login script" that executes when the user logs on to the system and updates the entry.
There is a registry file template mcdomain.reg in the server directory:
C:\Program Files (x86)\MyChat Server\doc\ActiveDirectory\mcdomain.reg
File content:
REGEDIT4
[HKEY_CURRENT_USER\Software\MyChat Client]
"Domain" = "Domain_name"
"IP" = "IP_adress_MyChat_Server"
"Port" = "PORT_MyChat_Server"
"AlternateIP" = "IP_adress_MyChat_Server2"
"AlternatePort" = "PORT_MyChat_Server2"
"ServerPassword" = ""
"Secured"=""
Domain — a domain name to which MyChat Client connects to;
IP — MyChat Server address (IPv4);
Port — TCP port to connect users (by default: 2004);
AlternateIP — alternative (backup) MyChat Server address (IPv4) ;
AlternatePort — TCP port to connect users (by default: 2004) for alternative server;
ServerPassword — server password for protection against public access (not to be confused with user password).
Secured "1" if you need to use traffic encryption when connecting to the server
Fill these four fields and copy mcdomain.reg file into the shared network folder (same folder where the mcclient.msi is located).
Now, let's look at the login-script mcscript.cmd content (template in the C:\Program Files (x86)\MyChat Server\doc\ActiveDirectory\ folder) :
regedit.exe /s \\[SERVER_NAME]\[SHARED_FOLDER]\mcdomain.reg
SERVER_NAME — network name (Host) or server IP address;
SHARED_FOLDER — name of the shared network folder where mcdomain.reg files are located (\SHARED_FOLDER folder should not be hidden);
regedit.exe /s "/s" key to entry the data into the registry without questions (question dialog window doesn't show up).
Copy the mcscript.cmd file into the login-script directory:
\\[Server_name]\SysVol\[Domain_name]\Policies\[CLSID]\User\Scripts\Logon\
For example:
\\W2008\SYSVOL\NSS\Policies\{4F3B38EA-961E-4D71-8AF6-E6B2C1BC4F0D}\User\Scripts\Logon\
line parameters:
W2008 — server network name;
NSS — domain name;
{4F3B38EA-961E-4D71-8AF6-E6B2C1BC4F0D} — CLUID of the customizable Group Policy.
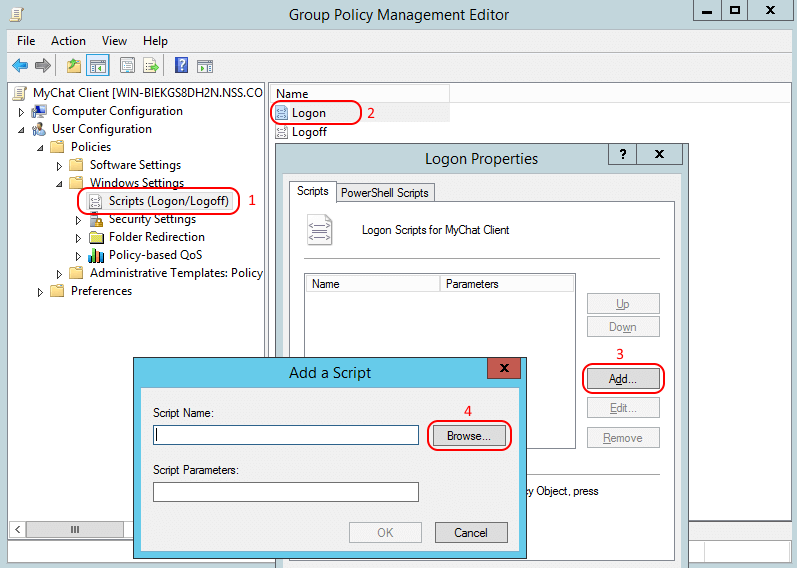
After you have prepared mcdomain.reg и mcscript.cmd files, go to GP Editor "User Configuration" — "Policies" — "Windows Settings" — "Scripts (Logon/Logoff)", then open "Logon " item, add mcscript.cmd script and specify the network path to it.
Attention! Usually, when you open the login-script manager in the Group Policy Editor and click "Browse", a directory, where the system searches for this script, opens automatically. You can copy the path and use it for mcscript.cmd script copying.
4. Setting up users departments
Group Policy for MyChat Client deployment in a corporate network is ready.
Now you have to link this GPO with one or more Active Directory users units, who will use the chat.
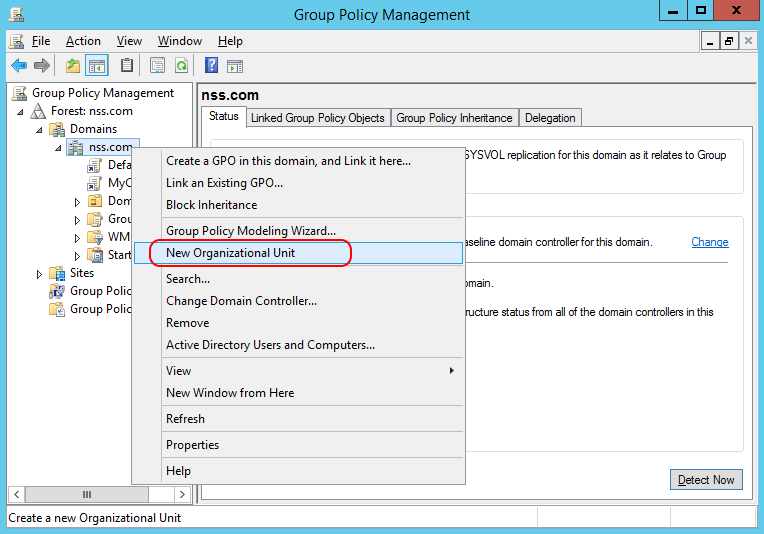
For example, let's create a unit for MyChat users and then link it with ready Group Policy:
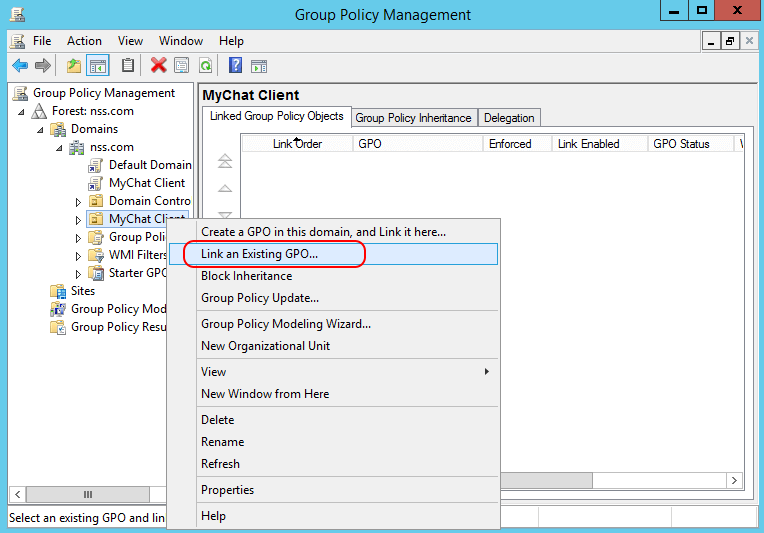
Next, link a Group Policy Object with the unit, select needed unit and link it to the GPO:
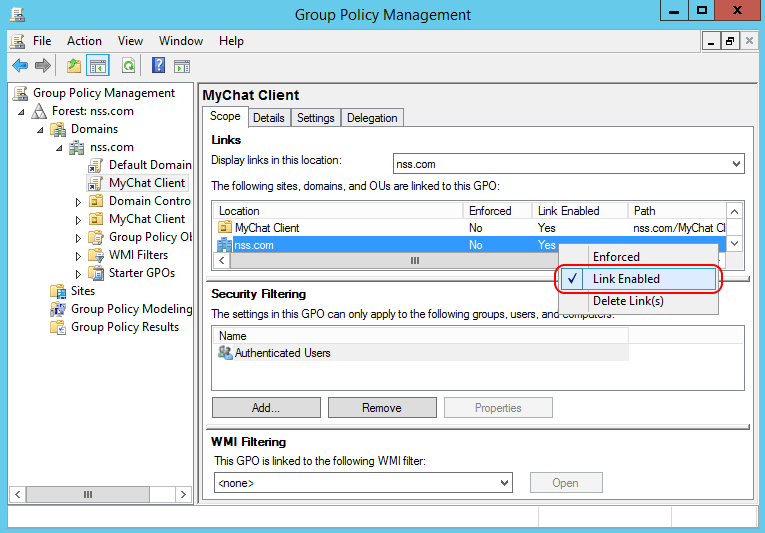
Since each new Group Policy isn't linked to any unit then it extends to the entire domain. Open MyChat Group Policy and disable (or delete) linking between our Group Policy and domain root:
Close MyChat Group Policy Management Editor and server manager.
Run the "GPUPDATE/FORCE" command in the command line for immediate Group Policy application.
Users who belong to the unit with this GPO fulfill all conditions of MyChat Client installation and configuration.
5. Import users from Active Directory into MyChat
You can import users with their full profile information in two ways: